Filming an Audition or Solo Performance - Level 1
In this level, you will learn tips and tricks for creating a polished video recording of an audition or other solo performance. The final challenge will be to film and edit a final performance.
On your journey to tackle the Final Challenge and complete the Level, you will need to earn 2 Power Ups and gain 2 Experience Points along the way.
- Power Up by learning to create a tripod for your phone out of binder clips
- Gain Experience by checking lighting, background, and sounds in your surroundings
- Gain Experience by choosing a outfit and experimenting with framing
- Power Up by exploring video editing apps
- Take on the Final Challenge by filming and editing a recording of a solo performance
Materials Required:
- Smart phone or other video recording device
- Binder clips or a phone tripod
- Computer access for video editing
This Level Up Challenge is inspired by Lights, Camera, Audition! (dramatics.org) written by Harper Lee with contributions by Kevin George.
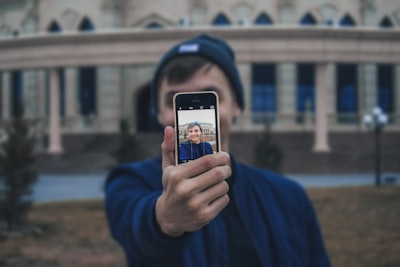
POWER UP: Learn to Make a Phone Tripod

To achieve a high quality recording using your phone, it is important to set your phone up on a tripod so that you can control the angle of the camera and keep the phone steady during filming. Don't own a tripod for your smartphone? No problem. You can create a homemade phone holder using only binder clips.
TO POWER UP: Create your own phone holder with binder clips or other materials you have at home. There are multiple ways to make a tripod with binder clips - search the internet or experiment and create your own.
GAIN EXPERIENCE: Set Up Your Surroundings

Now that you've powered up your filming by setting up a tripod or other holder for your phone, it's time to examine the surroundings of where you plan to film your performance. When thinking about your surroundings, you will want to consider three things: lighting, background, and audio quality.
Lighting: When you’re setting up your phone, don't point the camera towards a window or other light source. Standing in front of a light source will cause the camera to pick up your silhouette and make it hard to see your facial expressions.
Light sources should be shining on you from behind the camera. If possible, try to use natural light such as a window. If you use a lamp, try to set one up on either side of the camera so that both sides of your face are equally lit.
Background: Avoid cluttered and visually busy backgrounds such as patterned wallpapers. You want viewers to be focused on you and your performance, not distracted by looking at photos on a wall or trying to read the names of books on a shelf behind you. A blank wall works well, or you could hang a curtain or sheet behind you if needed.
Audio Quality: Once you’ve found or created a space with good lighting and a decent background, sit in the space and listen for 10 minutes. What do you hear? Any ambient noise that could be distracting during your performance? Try to minimize any extra noise in the space such as fans or heat turning on, sounds coming from other rooms, etc.
TO EARN XP: Set up your surroundings for your performance and take into account the lighting, background, and audio quality. Test each aspect and make adjustments as needed until you are happy with the results.
GAIN EXPERIENCE: Experiment with Clothing and Framing Options
Now that you've set up the environment where you'll be filming, it's time to make sure you look good within the frame. To look your best, you will want to consider your clothing choices and experiment with different shots/framing while filming.
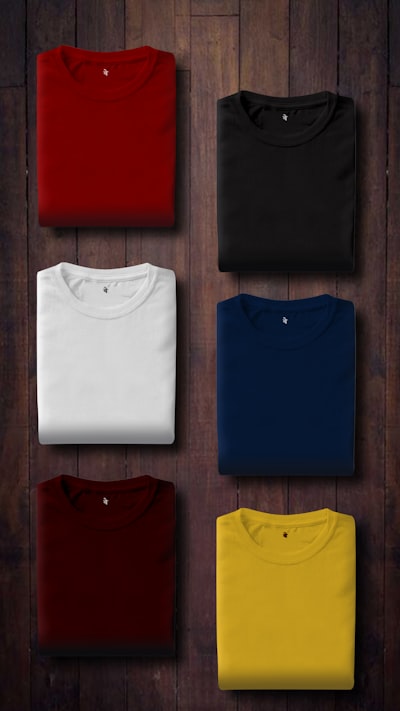
Clothing: Your outfit and hair should be neutral and not distracting. Try to wear a solid colored top and avoid patterns if possible. Consider the color(s) of your background and make sure you don't blend in. Remember to check for any attire guidelines or requirements if you are submitting your performance for an audition or other submission.
Framing of the Shot: You may want to experiment with how much of your body is visible in the recording. Moving further away from the camera will create a wide shot that may include your entire body. Moving the camera closer might mean that only your chest and above is visible in the shot. Complete multiple takes and experiment with different shots to see which one serves the piece best. Again, remember to check for any guidelines or requirements if you are submitting your performance for an audition or other submission.
TO EARN XP: Film multiple takes of your performance with some different clothing and framing options. Take note of what you like from your experimentation and pick the outfit and the framing that you like best.
POWER UP: Explore Video Editors
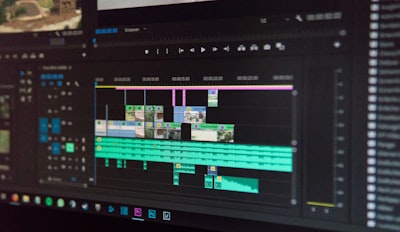
Now that you've gained the needed experience by setting up your filming environment and experimenting with clothing and framing options, you are almost ready to tackle the final challenge.
In order to finalize and polish a filmed solo performance, you will likely need to do some basic video editing to your recording. When it comes to video editing software, some video editors may come pre-downloaded on your computer, some require additional downloads and some are browser-based and your projects are stored in the cloud. Some options include WeVideo, Windows 10 Video Editor (available on computers with a Windows operating system), and iMovie (available on Mac computers).
TO POWER UP: Research different video editing software options and pick one that you want to try for your recording.
FINAL CHALLENGE: Film and Edit a Solo Performance


During this journey, you powered up by learning to make a phone tripod and exploring video editing software options. You also gained experience by setting up your surroundings to be visually appealing and experimenting with different clothing and framing choices for your recording. Now, using the power ups and experience points you gained along the way, you are ready take on the final challenge: filming and editing your solo performance.
Tips: Do a test recording to make sure your voice can be heard. If you're struggling with sound quality, you could ask someone to help you record audio separately on a second phone or other device. For example, have a friend hold a second phone just outside the camera frame as you perform. Then, you can sync the two files up in editing. One easy way to do this is to clap your hands at the beginning of the recording so you can align the clap in the video with the clap sound from the audio to match the two files up. Do multiple takes to get a recording of a performance that you're happy with.
TO COMPLETE THE FINAL CHALLENGE: Film a solo performance using a phone or other device. Use video editing software to do any editing necessary (trimming the beginning and end of the recording, etc).
PREPARE FOR THE NEXT LEVEL
Ready to move on to the next level in Filming a Solo Performance? Here's how you can prepare:
Download and review the Thespys™Acting Rubric if you're doing a monologue or the Thespys™ Musical Theatre Rubric if you're doing a song. These will be used in Level 2 to guide us through the process of reflecting on our performance and how we can improve. Also, grab a learning buddy. Let's do this!
Think you can handle the challenge of refining your performance with the help of a buddy? Prove yourself by clicking the button below and accessing FILMING AN AUDITION OR SOLO PERFORMANCE: LEVEL 2.